


Ever wondered how your favorite chocolate bar comes to life, from bean to blissful bite?
Making chocolate at home from raw cocoa beans is rewarding, incredibly fun, and educational.
With a little patience, some basic tools, and a love for chocolate, you will know how to make chocolate from cocoa beans.
So we shall be exploring;
Why Make Chocolate from Cocoa Beans?
Crafting your own chocolate lets you pick every detail, from how sweet to how smooth, and even where the cocoa comes from.
It’s a fun way to savor the quality in every chocolate bite you love.
Plus, it’s a tasty hands-on way to learn how to make chocolate from cocoa beans, connecting you to the bean-to-bar journey.
Whether you’re into healthy eating, DIY cooking, or surprising loved ones with a special treat, homemade chocolate brings joy and pride.
What you will need to Get Started
You do not need a professional kitchen to make chocolate; you need a few essential tools and ingredients.
Having these on hand before starting will streamline the process:
- Raw cocoa beans (fermented and dried)
- Roasting pan or oven
- Food processor, blender, or stone grinder (melanger)
- Hairdryer or small fan (for winnowing)
- Thermometer (preferably digital)
- Chocolate molds (silicone or polycarbonate)
- Optional ingredients: sugar, cocoa butter, milk powder, vanilla, salt, and spices
Preparing your workspace in advance and organizing your tools step by step will ensure a smoother, more enjoyable experience from beginning to end.
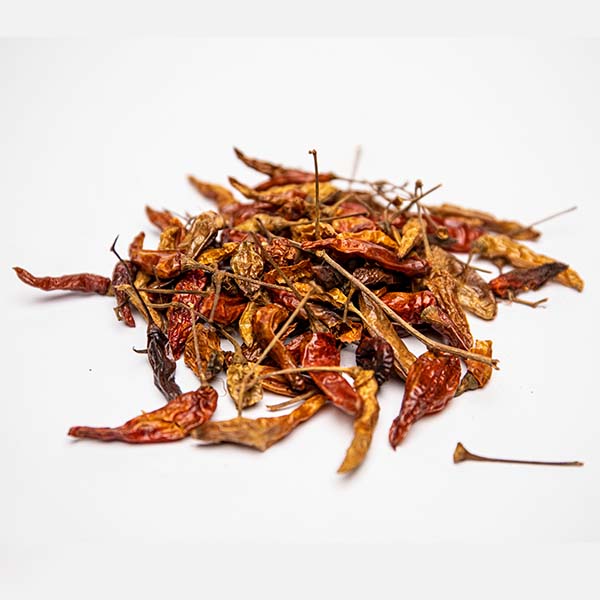
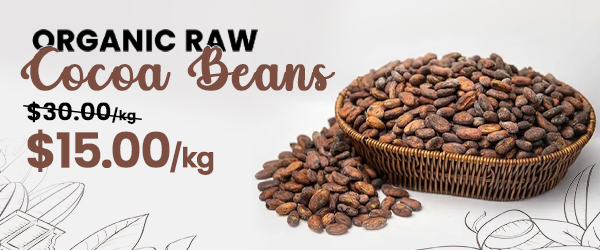
By the way, if you’re wondering where to get started, know that Baobabmart has enough stock of raw cocoa beans for sale.
Why us? We have the best rates, and our cocoa beans are extracted directly from Africa!
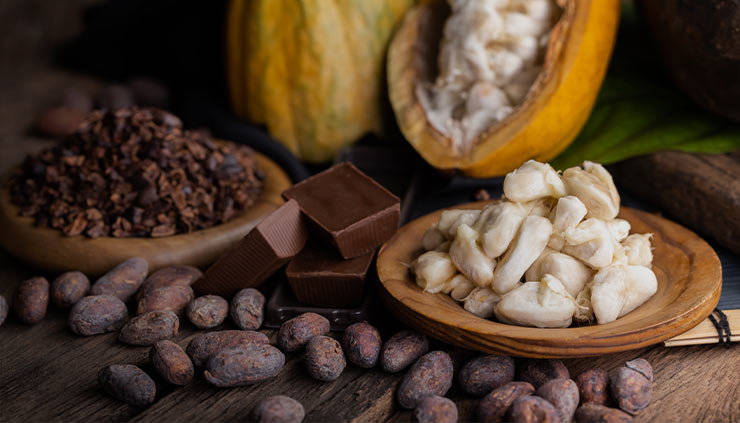
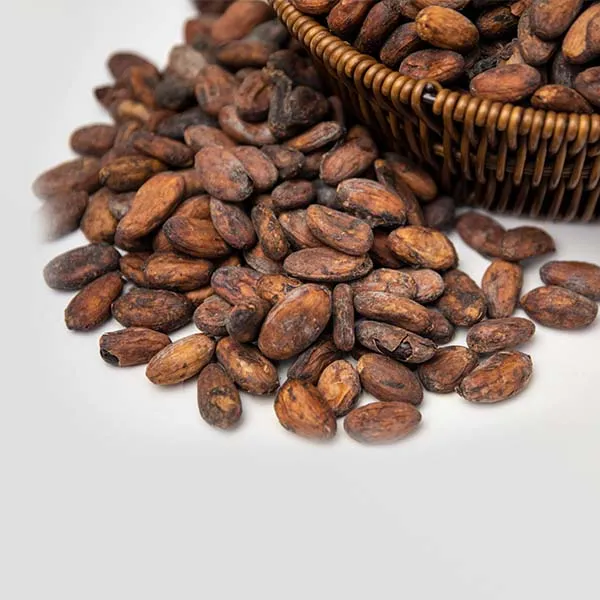
Step 1: Sourcing Quality Cocoa Beans
Great chocolate begins with great beans.
The quality of your starting ingredient affects everything: flavor, aroma, and texture, so do not skimp here.
Types of Cocoa Beans to Choose
There are three main types of cocoa beans to choose from:
- Criollo: Highly prized for its complex, fruity flavors, but low-yielding and disease-resistant.
- Forastero: Robust and commonly grown; has a strong, earthy flavor and high yield.
- Trinitario: A hybrid of Criollo and Forastero; combines rich flavor with hardiness.
Each type of bean contributes its unique nuances to chocolate.
Criollo is ideal for those seeking a gourmet experience.
Forastero is reliable for both learning and bulk production.
Trinitario provides a balance of both worlds.
Where to Buy Fresh Cocoa Beans
Look for reputable sources like Baobabmart when purchasing cacao beans. Here are a few options:
- Online specialty chocolate or cacao retailers
- Ethically sourced cooperatives or direct trade websites
- Local gourmet or health food stores
- Farmer’s markets or tropical supply stores (if you’re in the right climate)
Ensure your beans are properly fermented, sun-dried, mold-free, and packaged in breathable bags.
Good suppliers often provide the origin, variety, and flavor notes—much like coffee beans.
Hey! Did you miss our promo or not on our email list? Baobabmart’s got tons of raw cocoa beans for you to grab!
Our premium Organic Raw Cocoa Beans are unprocessed, bursting with a rich, vibrant flavor profile, and packed with essential nutrients
Step 2: Roasting the Cocoa Beans
Roasting develops the beans’ flavor, kills bacteria, and loosens the shells for easier processing.
This is where raw cocoa begins to smell and taste like chocolate.
How to Roast for Maximum Flavor
Preheat your oven to 250°F (120°C).
Spread the beans on a baking tray in a single, even layer.
Roast for 20–30 minutes, stirring every 10 minutes to ensure even exposure.
Flavor development is personal—lighter roasts bring out citrusy or floral notes, while darker roasts create bold, earthy tones.
Keep a roasting journal to track temperatures and times for consistency.
Tips to Avoid Overcooking
- Smell is your guide—if it smells burnt, it probably is.
- Cut a bean in half—brown means roasted, black means overdone.
- Start with small test batches to fine-tune the perfect roast for your beans.
Use a baking thermometer or even an air fryer or convection oven for more precise control over heat.
Step 3: Cracking and Winnowing
Now that the beans are roasted, it is time to extract the flavorful nibs by removing the shells.
This process, called winnowing, is essential for purity and smooth texture.
Removing the Shells with Ease
Let the beans cool completely before cracking. Place them in a ziplock bag and gently roll over them with a rolling pin.
You can also use a hand-crank cocoa cracker for more even results.
The goal is to break the beans without crushing the nibs into dust.
Shake or sift the mixture lightly to separate nibs from lighter husk material.
Tools for Efficient Winnowing
Use a bowl and a hairdryer on a low, cool setting to blow the lighter shells out while retaining the heavier nibs.
A fan placed sideways over a shallow tray can also help with separation.
Advanced DIYers often build winnowing boxes with vacuum chambers or screens to improve yield and efficiency.
Patience and repetition will reward you with clean, aromatic nibs regardless of method.
Step 4: Grinding into Cocoa Liquor
With your nibs ready, the next step is grinding them into a paste known as cocoa liquor.
This step releases natural cocoa butter, turning solid nibs into a thick, luscious fluid.
Using a Grinder or Food Processor
Begin with a high-powered food processor or spice grinder.
Add nibs in small batches to avoid overheating the motor.
Pulse and blend until the mixture thickens and becomes glossy.
For professional results, transfer the paste into a melanger (stone grinder).
These machines can run for up to 24 hours, continuously refining and smoothing the chocolate.
Achieving the Right Consistency
The ideal texture should be silky smooth and free of grit.
Add cocoa butter (1–5%) to aid flow and polish.
The temperature should be kept below 50°C (122°F) to retain delicate flavors.
If adding sugar, vanilla, or milk powder, do so gradually during this phase for full incorporation.
Step 5: Conching and Refining
Conching is what turns grainy paste into chocolate with a perfect mouthfeel.
It also rounds out any sharp flavors by oxidizing and driving off unpleasant acids.
What Is Conching, and Why Does It Matter
Conching involves heating, aerating, and mixing chocolate for several hours.
This breaks down volatile compounds, develops texture, and transforms raw flavor notes into smooth complexity.
Originally done in stone drums, it can now be simulated at home using melangers, slow cookers on low, or by constant hand-stirring over gentle heat.
Simple Methods for Smoother Chocolate
Without a melanger, you can continue refining the mixture in a food processor.
Keep the paste warm and stir it frequently.
Optional ingredients like soy lecithin or sunflower lecithin (used at 0.3% by weight) can improve flow and texture. Taste and adjust as you go.
Step 6: Tempering Your Chocolate
Tempering stabilizes cocoa butter crystals to give chocolate its professional snap, gloss, and melt-resistance.
It is a science—but one you can master at home.
How to Temper for a Shiny Finish
Use one of these methods:
- Seed Method: Melt 2/3 of your chocolate to 45–50°C, add finely chopped tempered chocolate, and cool to 31–32°C.
- Tabling Method: Pour melted chocolate on a cool marble slab, spread and fold until it cools, then reheat slightly.
- Sous Vide or Digital Thermostat: Use a precision cooker to control temperature for precise results.
Test temper by dipping a spoon or knife into the chocolate—it should harden within 3–5 minutes and have a smooth, shiny surface.
Common Tempering Mistakes to Avoid
- Overheating past 55°C breaks cocoa butter structure.
- Adding moisture causes seizing (grainy mess).
- Skipping the cool-down phase results in soft or streaky chocolate.
Invest in a digital thermometer and always temper in small, manageable batches for the best outcome.
Step 7: Molding and Cooling
Once tempered, you are ready to mold and set your chocolate.
This is where your creation takes shape and becomes your very own chocolate bar.
Shaping Your Chocolate Bars
Pour chocolate into molds slowly.
Tap gently to release trapped air bubbles. Use molds made of food-grade silicone or sturdy plastic designed for chocolate.
You can customize it by adding crushed nuts, candied ginger, chili flakes, or dried fruit.
Layer flavors for visual and taste appeal.
Best Cooling Techniques
Set the filled molds in the fridge (not freezer) for 10–15 minutes.
Then, transfer them to room temperature and let them rest for 1–2 hours.
Avoid humidity, which can cause sugar bloom. Store in a cool, dry cabinet for consistent results.
Once fully set, carefully demold and wrap your bars in foil or parchment, then store them in airtight containers or gift boxes.
Tips for Perfect Homemade Chocolate
Chocolate making is a mix of precision, patience, and passion.
These tips will help you hone your craft.
Adding Sweeteners and Flavors
- Use powdered sugar for smooth blending.
- Add a pinch of salt to enhance sweetness and depth.
- Infuse with espresso, orange zest, lavender, or liqueurs for artisanal flair.
- Experiment with milk alternatives (coconut milk powder, oat powder) for dairy-free versions.
Start with small batches when testing new combinations. Always taste as you go.
Storing Your Chocolate Properly
Ideal storage conditions are 18–21°C (65–70°F) with less than 50% humidity.
Keep chocolate away from strong odors like garlic or onions.
Avoid refrigeration unless your climate requires it.
If you must refrigerate the chocolate, seal it tightly and allow it to reach room temperature before unwrapping to avoid condensation.
Frequently Asked Questions
Now let’s answer some of those questions our cocoa seeds customers and future chocolate enthusiasts like you asks about how to make chocolate from cocoa beans.
1. Where can I buy cocoa beans for making chocolate at home?
You can purchase high-quality cocoa beans online from retailers like Baobabmart for dried cocoa beans or Amazon for fermented dried beans.
2. Can I make milk chocolate with raw cocoa beans?
Yes, add 20% powdered milk (e.g., 20g for 100g batch) when blending. Use coconut or soy powder for vegan options.
3. Can I skip the fermentation step when making chocolate at home?
Yes, you can start with pre-fermented, dried cocoa beans, which are widely available
4. How long does it take to make chocolate from cocoa beans?
Fermenting the beans adds 5-7 days if you are starting from raw cacao.
5. Why is my homemade chocolate grainy or bitter?
Grainy texture comes from coarse grinding; use a high-speed blender. Bitterness means under-roasting; roast at 120–140°C (248–284°F) for 20–30 minutes. Try Baobabmart’s cocoa beans for better flavor!
My Final Thoughts
Making chocolate from cocoa beans at home is an exciting food journey.
It helps you love a worldwide treat and connects you to old traditions and skills.
Each step, from roasting to shaping, teaches you how to make chocolate from cocoa beans and boosts your skills.
And the best part?
You get a smooth, yummy chocolate bar you made yourself.
Whether it’s a fun weekend activity or a dream to start a chocolate business, homemade chocolate is a delicious adventure you’ll enjoy with every bite.